
Rock Shop Finishing Equipment Polishers, Laps and Saws


Item # COV1100-16/005962
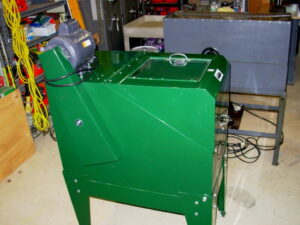
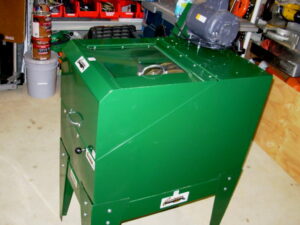
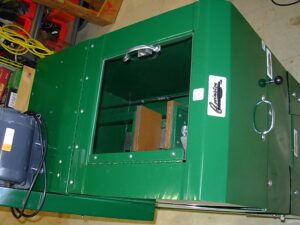
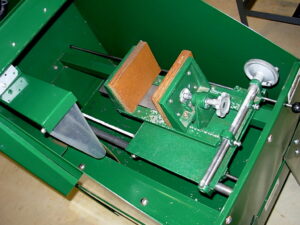
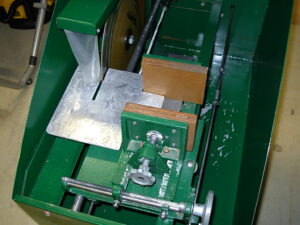
Used "as is" Covington 16" Slab and Trim Saw

We have a Covington Engineering gently used 16" Slab and Trim Saw with Leg Stand in stock ready for local pickup in Lake Toxaway, North Carolina.
- 1/2hp Motor
- 4" Cross feed adjusts 1/16" per turn for uniform slabbing
- Designed for Trimming and Slabbing
- Light enough to be moved easily, Heavy-duty enough (16g steel) for every day use
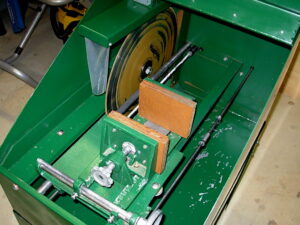
- Rigid Grip Vise: Steel jaw tongue contacts full length of vise, holding jaw square to avoid binding
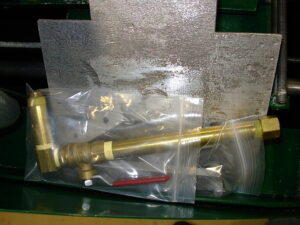
Covington's 1100 Series saws are designed with versatility in mind. Each saw is able to convert between a trim saw and a slab saw with a table that drops into the vise and fits securely. This saw is in good shape. Included is a brass drain valve assembly we made for draining the cutting oil.
Please e-mail us at ...srs2004@nc.net for any questions
WE DO NOT SHIP THIS SAW! IT IS LOCAL PICK UP ONLY IN WESTERN NORTH CAROLINA


Lortone Flat Laps
The Lortone FL-15 Vibrating Flat Lap is one of the favorites for rockhounds who are looking to polish their cut specimen faces, polish slabs for display or clock faces. The FL-15 from Lortone is also great for polishing Bookend sets in agate or your other favorite stone.
How to use your flat lap
There is much discussion about how to polish on these machines, here is what we have learned by trial and error. First, to get quality finishes you must use graded abrasive(100 grit), not graded range (60/90 grit). Second, you must really clean after each grit to prevent contamination of the next step. All it takes is one or two 100 grit grains to ruin a 220 grit finish. This becomes more critical as the grit becomes finer. That is why we prefer the Lortone Flat Laps over the competitors. Lortone provides 2 pans with each unit. One pan for grinding and one for polishing. This reduces the chance of contaminating the polishing stages with the earlier surfacing stages. We recommend complete scrubbing of each specimen after each stage or grit.
Okay, now to the grit, What grit you start with basically depends on how accurate the cut is from your saw. If you have a perfect cut the number of stages is reduced. If you see saw marks on your specimen, sit down, this one's going to take a while.
Our recommendations are;
Smooth cut specimens....start with 220 grit for 8-12hrs, clean, 600 grit for 8-12hrs, clean, 1000 grit for 8-12 hrs, clean, Tin Oxide or Cerium Oxide polish for 8-12 hrs.
Saw Marked specimens....These are the toughest...I generally run these through more grit stages to obtain the best finish. Start these with 80 or 100 grit. Lap these until you can mark the surface of the specimen with a pencil and all the pencil marks disappear completely within 5 minutes. Do this for every stage of grit and you will never go wrong. Spending the extra effort in the rough stages will produce better results in the final polish stage. I have one specimen of Brazilian banded Agate that my saw jammed on and gouged the face. It is such a stunning stone that I decided to grind this gouge out rather than re-cut it and lose more material. I put this one in with every batch of 80 grit I do. When the other specimens are done with this stage and the agate is not, I clean it up and put it on the shelf waiting for the next 80 grit stage. Sooner or later it too will be ready to move on. The point here is to not get in a hurry. It took mother nature millions of years to make this specimen, so if it takes you a few days, weeks, months or years to polish it you are still way ahead! Anyway, back to the lapping....after the 80 or 100 grit stage, clean, move to 400 grit for 8-12 hrs, clean, 600 grit for 8-12hrs, clean, 1000 grit for 8-12 hrs, clean, Tin Oxide or Cerium Oxide polish for 8-12 hrs.
There are other grit grades that you can try. Don't be afraid to experiment and don't get in a hurry. 1200 grit produces some wonderful looks on some stones and there are a wide variety of polishes to choose from. Some work better on different types of stones, some you will like, some you will throw away, depending upon what you are trying to polish. Each polish has it's special use and it takes a while to learn them all.
Tips and Tricks to make your polishing easier
We always place a drop or two of Palmolive liquid dish soap in our grit slurry mix. On the FL-15 we use 4-5 Tablespoons of grit mixed with water until it just starts to splash at the edges by the outer pan ring. Add 1 or 2 drops of the Palmolive allows the grit to better adhere to the surfaces of the rock you are lapping and makes the process work better. We use a plastic spray bottle to add water to our slurry and also have a Lortone overhead drip watering system slowly adding drops of water throughout the lapping process to maintain the consistency of the slurry. If this is your first time using a lap, be aware that this is not an indoor sport. Great in a garage or basement, but these laps can make a mess of the surrounding area in a hurry if the slurry gets too wet. Since the desired mix is at the very edge of when it slurry starts to splash, it normally splatters out during the process.
Protecting your Rocks from Damage
Another trick we learned from Wally at the Fallon Rock shop was to cut up old (or new) inner tubes from yard machinery into wide rubber band like strips and place them around your rocks or geodes to protect them. You can even use 2 or more to get the correct thickness of protection you need. The object is to prevent rock to rock contact. Leave the factory outer bumper ring in if you use this method. We have setup bins to store used bands in divided by the grit size to allow reuse without contamination of grit size.
Polishing Slabs
Polishing slabs is more difficult. Normal slabs are too light to polish well without being weighted. Most recommendations we have received were to use lead weights (which you must make yourself) I ran into an old rockhound who asked, "Why buy lead if you already have rocks" made sense to us so we now polish our slabs using cut face rocks attached to the slab with small multiple pieces of double back tape. If your weight rock is larger in diameter than the slab, protect the weight rock edges. If your weight rock is smaller in diameter than your slab, we like 1/4" plexiglass or acrylic cut larger than the slab, taped to slab, then taped to the weight rock. Remember, the objective here is to evenly distribute the weight over a surface larger than your slab. An off-center weighting will cause a very bad finish. Once again the best way to get into this is just jump in and give it a try. Remember, it's a hobby...a lifestyle...NOT a job. I believe it was Thomas Edison who said something to the effect that he did not fail many times trying to make a light bulb...he just learned many ways NOT to make a light bulb.
We hope this helps you in your efforts at polishing rocks using a vibrating flat lap
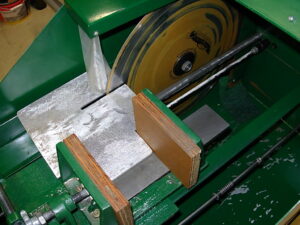
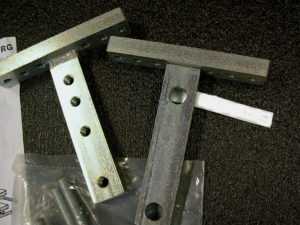
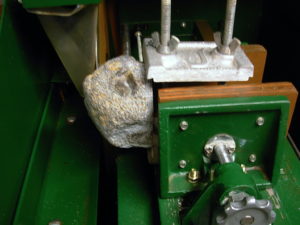
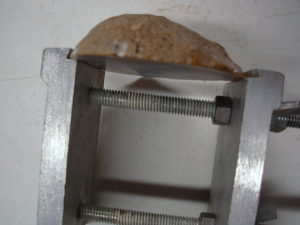
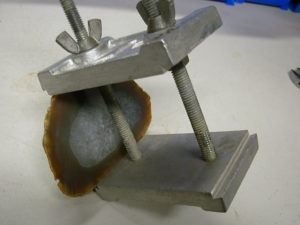
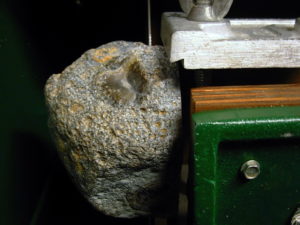
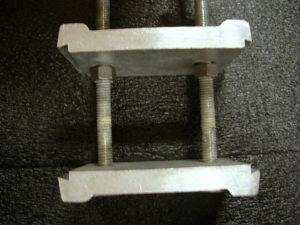
A few years ago we picked up some lapidary rock holders from an industrious rockhound from Cody, Wyoming. Have you had problems holding rocks in your saw vise? This fellow made these interesting 3 arm rock holders that solidly hold irregular shaped rocks. The rock holder is clamped firmly on parallel sides in your slab saw vise. There are three sizes of these rock holders and each comes with an extra set of arms. photos here show one of these in our covington 16" saw set up to center cut a septarian. The rock can be rotated in the rock holder and tightened in place with an allen wrench.


Item # LRG12180095
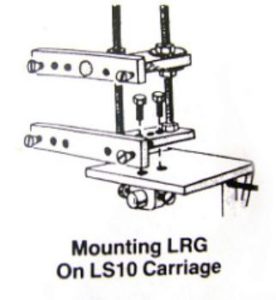
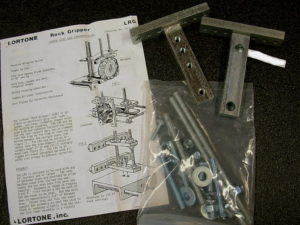
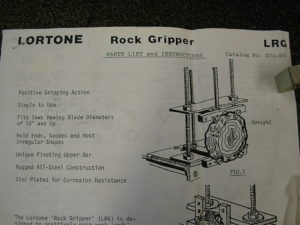
Lortone LRG Rock Gripper
Lortone 701-LRG-1 Rock Grabber has a heavy steel pivoting top bar gives incredible strength and holding power. Electo-plated for rust protection. Bolts directly to all Lortone Slab Saws. This is new old stock
Item # JRG12185991
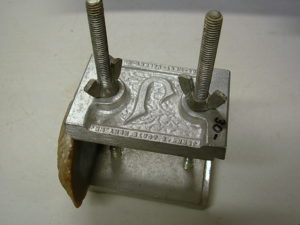
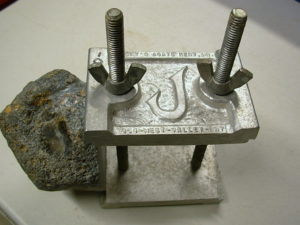
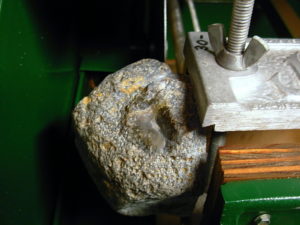
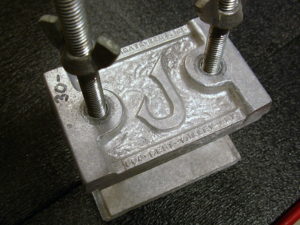
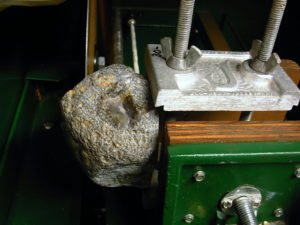
Original 1950's Jerrys Agate Shop Used Slab Grabber
Jerry's Rock and Gem was established in 1954 as Jerry's Agate Shop by a Boeing machinist named Jerry Appleton. He wanted to supply his own rock habit and to fill the needs of other rock hounds. Made out of durable Cast Aluminum, about 3/8 inch thick. It will help you get the most out of your rough material. Don't throw away those end pieces. This clamp firmly grips in both grooved ends. The jaws are 2.6 inches wide and will easily open up to hold slabs up to 5+ inches wide. You can change the threaded screws to longer ones to make it open even wider. It was designed for slabbing end pieces which can be cut with minimum end piece waste